Overview
This guide walks you through setting up OKTA Single Sign-On (SSO) integration with Diligent. Follow these steps to enable your team to authenticate using your OKTA account.You’ll need admin access to your OKTA Admin Console to complete this setup.
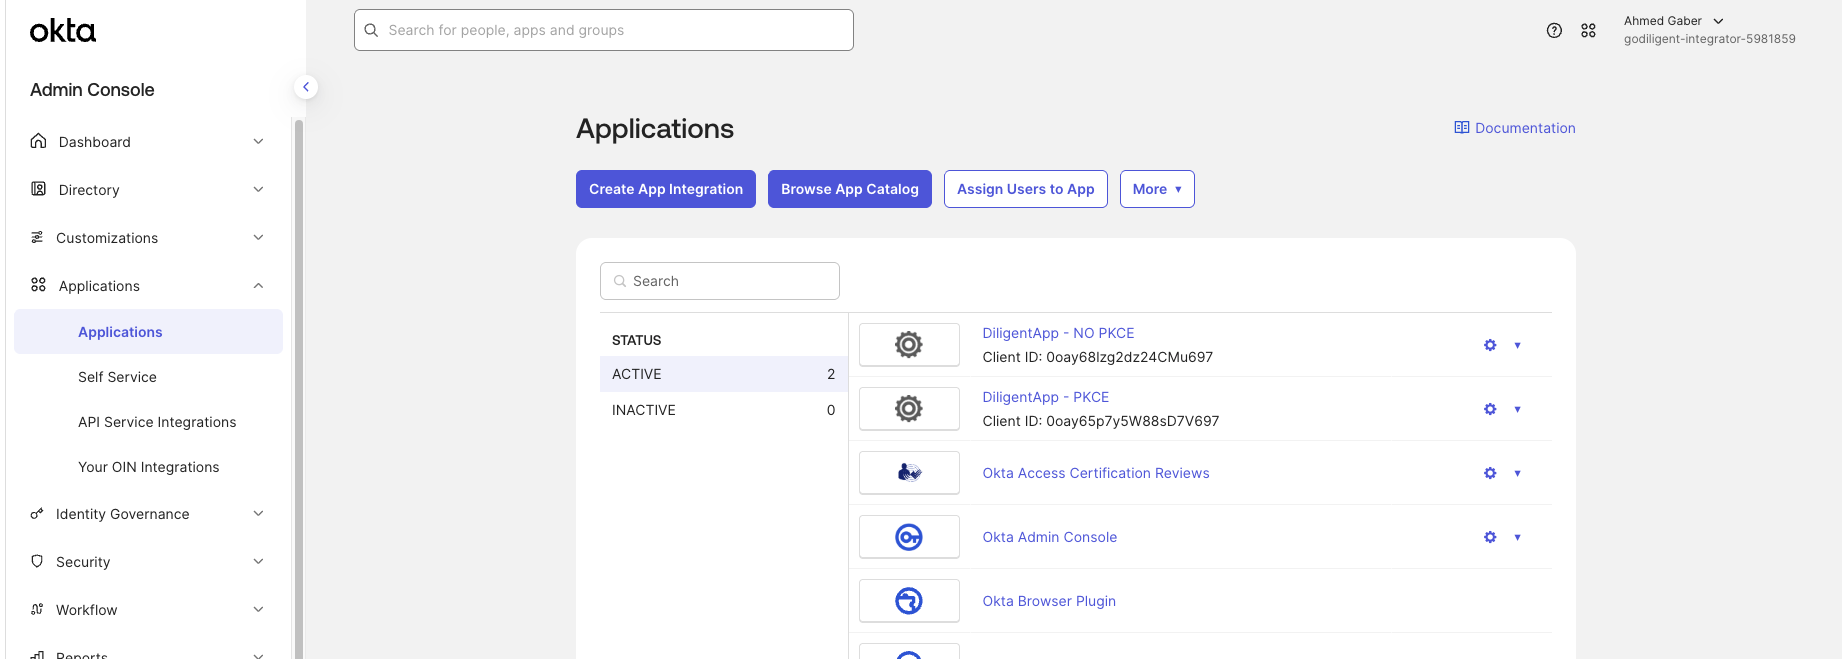
Step 1: Create a New App Integration
- Log in to your OKTA Admin Console
- Navigate to Applications in the left sidebar
- Click the Create App Integration button
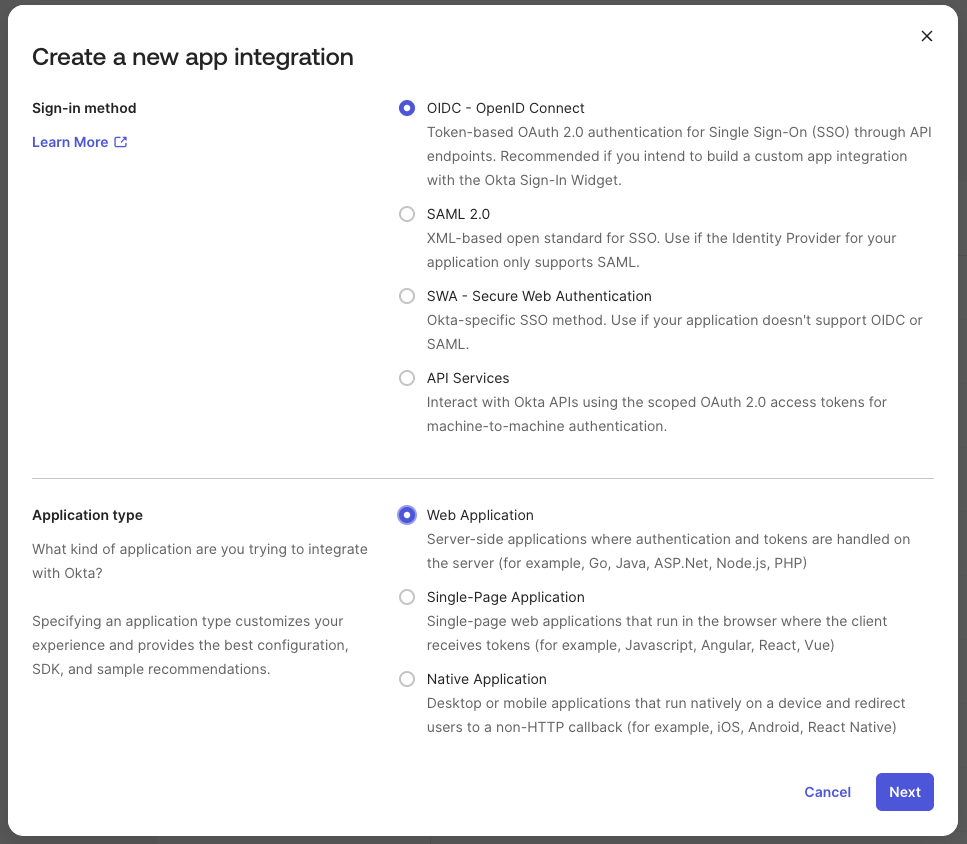
Step 2: Select Sign-in Method and Application Type
In the “Create a new app integration” dialog:-
Sign-in method: Select OIDC - OpenID Connect
- This provides OAuth 2.0 authentication for Single Sign-On (SSO) through API endpoints
-
Application type: Select Web Application
- Server-side applications where authentication and tokens are handled on the server
- Click Next to continue
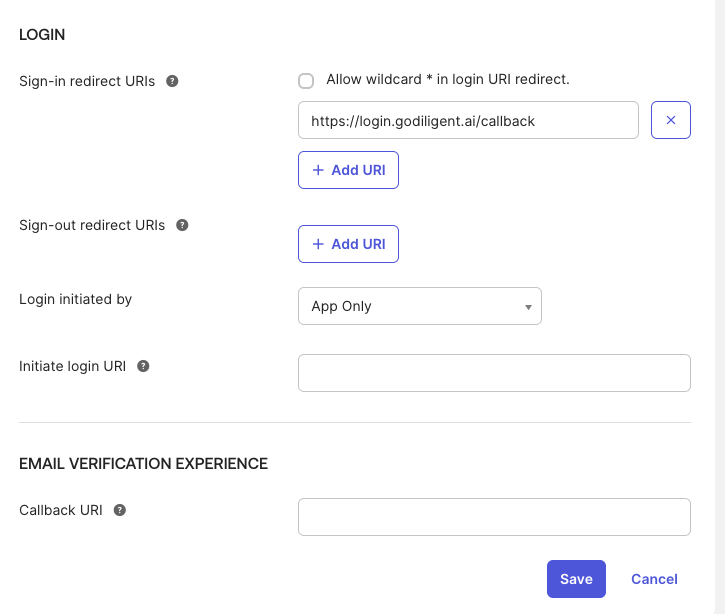
Step 3: Configure Login Settings
Configure the following settings:App integration name
Enter a name for your app integration, e.g., “DiligentAI”Sign-in redirect URIs
Add your Diligent callback URL:- Click Save to create the application
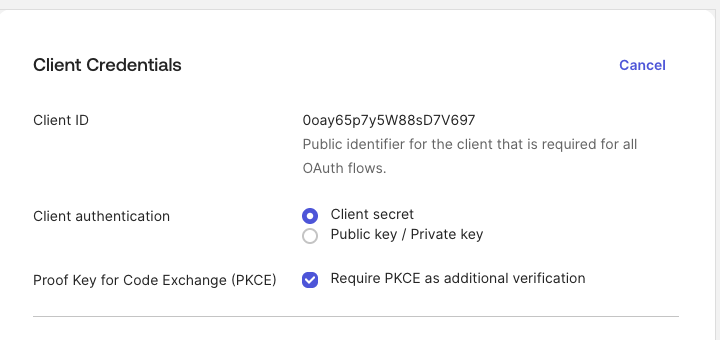
Step 4: Configure Client Credentials
After saving, you’ll see the Client Credentials page:-
Client ID: This is automatically generated (e.g.,
0oay65p7y5W88sD7V697)- This is the public identifier required for all OAuth flows
-
Client authentication: Select Client secret
- This option uses a client secret for authentication
-
Proof Key for Code Exchange (PKCE): Check Require PKCE as additional verification
- This adds an extra security layer to the authentication flow
Step 5: Retrieve Client Credentials
- On the Client Credentials page, copy your Client ID
- Click Show or navigate to the credentials section to reveal your Client Secret
- Copy the Client Secret
Step 6: Share Credentials with Diligent
Send the following information to our support team at support@godiligent.ai:- Client ID:
[Your Client ID] - Client Secret:
[Your Client Secret] - OKTA Domain:
[Your OKTA domain, e.g., yourcompany.okta.com]
Testing the Integration
Once our team confirms the integration is complete:- Navigate to
https://app.godiligent.ai
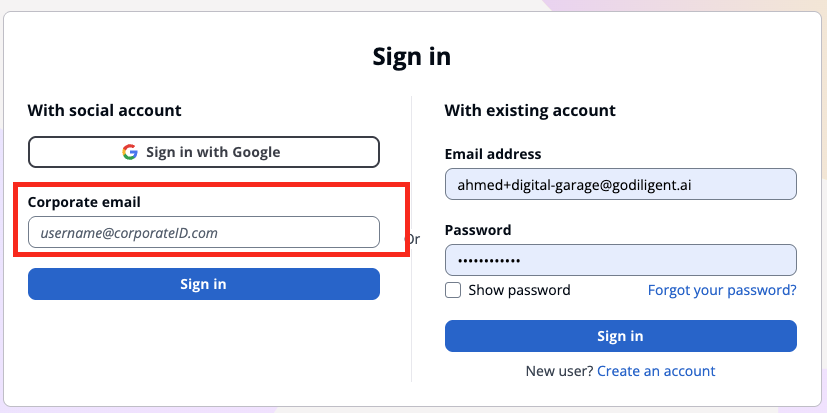
- Click Sign in with corproate email
- You’ll be redirected to your OKTA login page
- Enter your OKTA credentials
- You’ll be redirected back to Diligent and logged in
Troubleshooting
Users can't see the Diligent app in OKTA
Users can't see the Diligent app in OKTA
Make sure you’ve assigned the users or groups to the application in the Assignments tab.
Redirect URI mismatch error
Redirect URI mismatch error
Verify that the Sign-in redirect URI in OKTA matches exactly:
https://login.godiligent.ai/callbackAuthentication fails
Authentication fails
Contact support@godiligent.ai with the error message. We’ll verify the Client ID and Secret are configured correctly.
Need Help?
If you encounter any issues during setup:- Email: support@godiligent.ai
- Include your OKTA domain and any error messages you’re seeing